If you’re a beer enthusiast or someone who enjoys hosting gatherings at home, upgrading your kegerator with a double tap system can elevate your beer dispensing experience to a whole new level. With the ability to serve two different types of beer at the perfect temperature, installing a double tap system is a game-changer. In this guide, we’ll walk you through the process of installing a double tap system in your kegerator, ensuring you pour perfection every time.
Before you begin
Before diving into the installation process, make sure you have all the necessary tools and components. Here’s a list of items you’ll need:
- Kegerator with enough internal space for two kegs
- Double tap tower
- Faucets and shanks
- Beer lines
- CO2 tank
- Regulator and manifold
- Gas and liquid disconnects
- Wrenches, screwdrivers, and other basic tools
- Teflon tape
- Kegerator Cleaning Kit
- Tower insulator
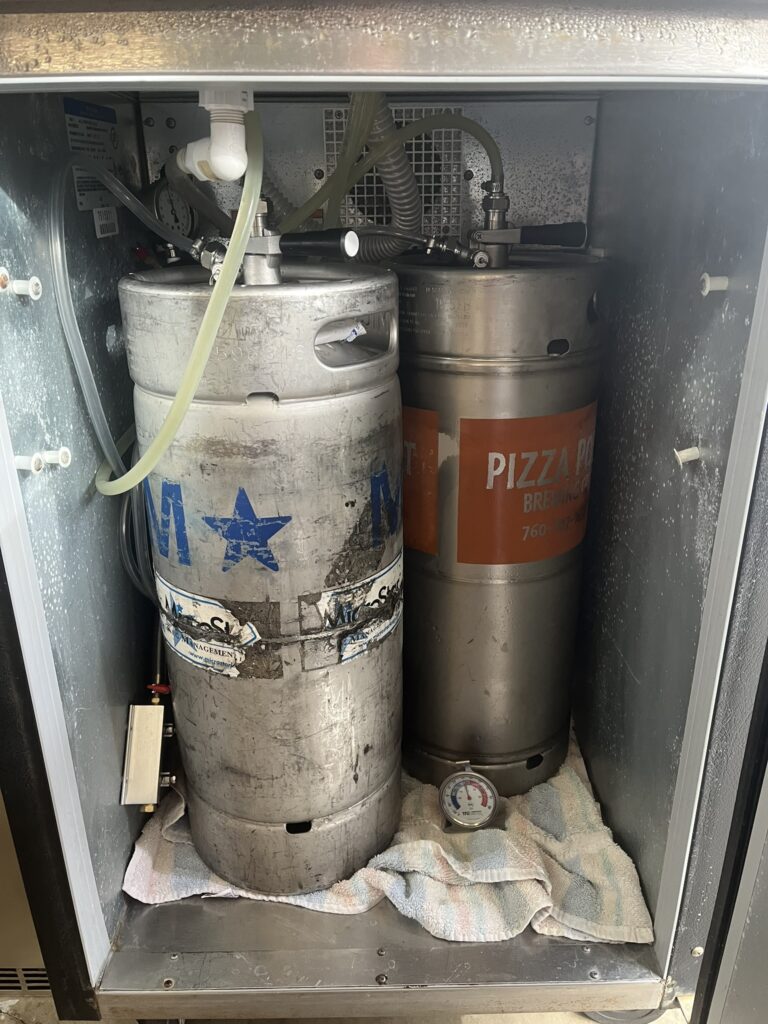
Step 1: Empty and Clean Your Kegerator
I received my Kegerator from my Uncle who is a bit of a perfectionist. Special Thanks to uncle Jeff!! I still had to go through the process of figuring out the nuances of how it works. Take the extra time to sterilize and clean EVERYTHING. It seems like a trivial issue but the yeast in beer can ferment just about any carbohydrate. Keep the environment clean is a must to prevent the flavor from becoming contaminated by wild yeast or bad fermentation in your lines.
Step 2: Plan your layout
Before beginning the installation, ensure your kegerator is empty and unplugged. Remove any existing taps, lines, and other components. Thoroughly CLEAN the inside of the kegerator to eliminate any residue or odors that may affect the taste of your beer.
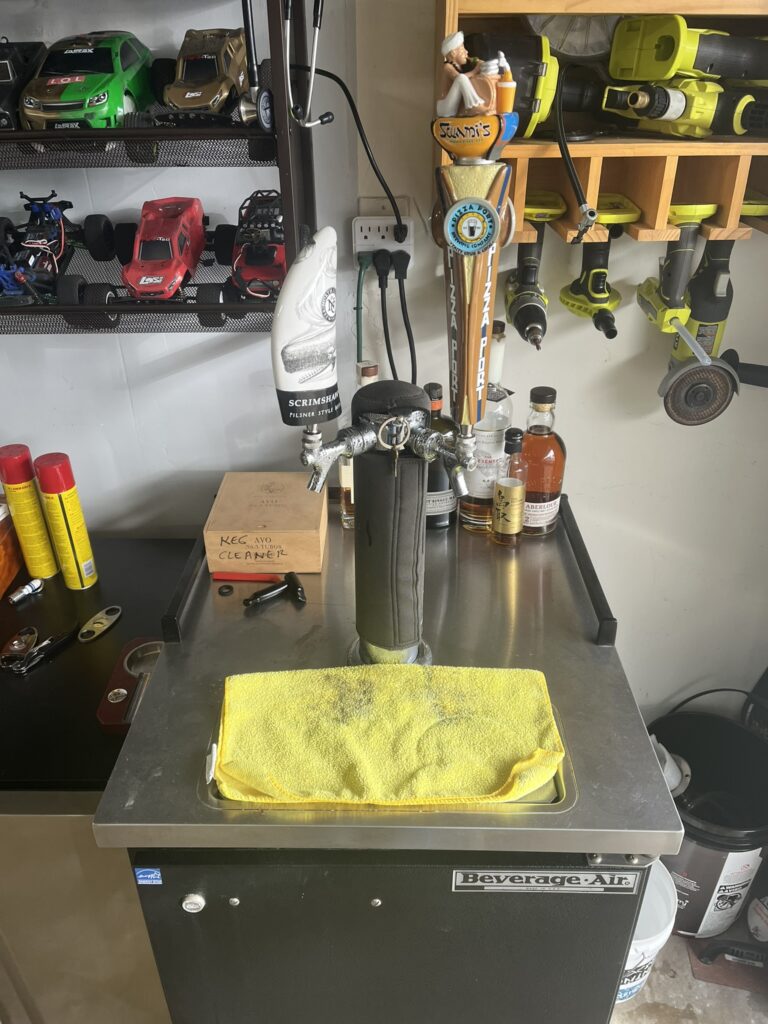
Step 3: Install the double tap tower
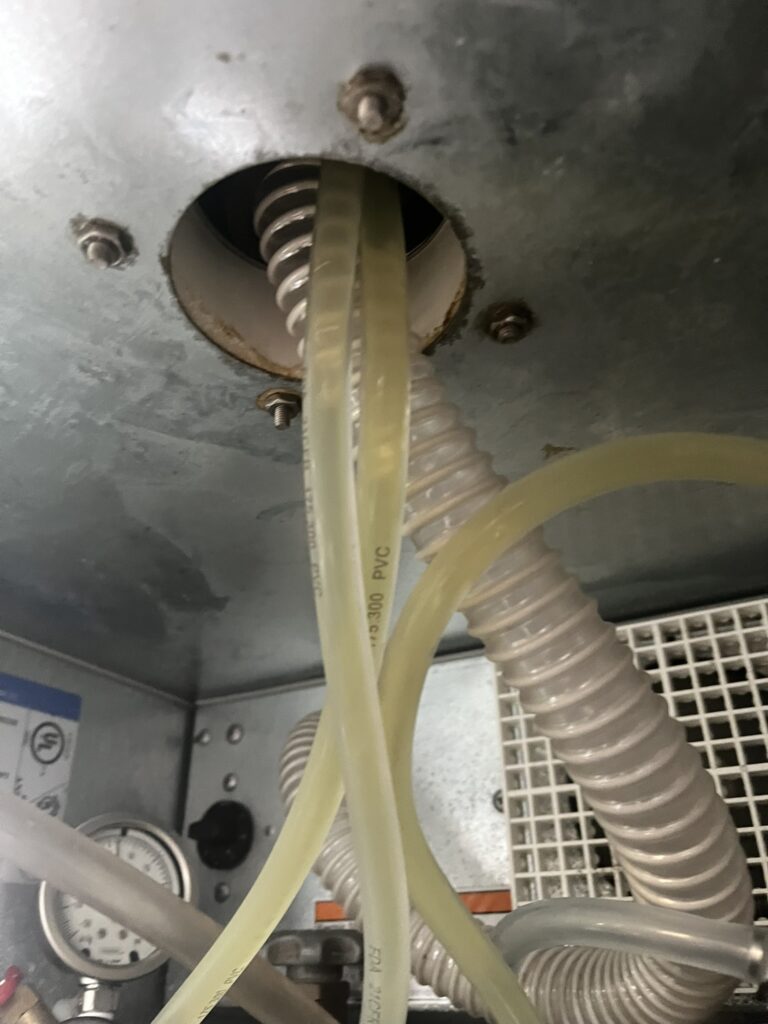
My kegerator had a single tap tower on it already so it was pre-drilled. It simply involved me removing a trim ring, 4 screws, and a rubber gasket and then installing in its place the new tower. Pretty straight forward from that standpoint. However, if you are making a kegerator on your own DIY style, this would involve you drilling the hole for your lines.
The trick for the lines is that the tower may require insulation or individual cooling to maintain the temperature of the lines. Temperature differences between the keg and the rising lines may cause the beer to foam if too big of a temperature difference is present. Less is more, so drill only as big as you need for it.
Step 4: Connecting Faucets and Shanks
Attach the faucets to the double tap tower, ensuring they are securely fastened. Connect the shanks to the faucets, and make sure the connections are tight. Apply Teflon tape to the threads for a secure seal. This is another location to pay attention to. Air leaks can result in lost CO2 pressure, excessive foam, or beer leaking from the fittings. All of these can be difficult to locate since the connections are inside the tower for the most part. So take the extra time and make sure they are properly sealed the first time.
Step 5: Install Beer Lines
Measure and cut the beer lines to the appropriate length, ensuring they reach from the keg to the faucets with a little slack. Length is a hotly debated topic in online forums but having too short of a line will again lead to excessive foam in the pour. It is much better to have lines that are too long than to short. Attach the beer lines to the liquid disconnects and connect them to the shanks. Double-check that all connections are secure.
Step 6: Connect CO2 System
Attach the CO2 regulator to the CO2 tank and secure it tightly. Connect the gas lines to the gas disconnects, and then attach the other end to the kegs. Adjust the CO2 pressure according to the specifications of your beer.
This is another area that is more trial and error than a straight forward chart of pressures. I would encourage you to hook up your keg and let it cool down and settle. Then bleed all pressure from the lines by closing the pressure regulator and pulling on the pressure relief valve to clear the keg and lines. Then open the one of the taps and let beer flow until it stops pouring. Then start opening the pressure regulator until it pours at a rate to your liking and gives you the foam head you are looking for. This is a finesse process and can be very frustrating. This is why you spend the extra time ensuring line length, temperature, and seals are done properly.
Step 7: The test
Drink up, you’ve earned it.
Extra Considerations
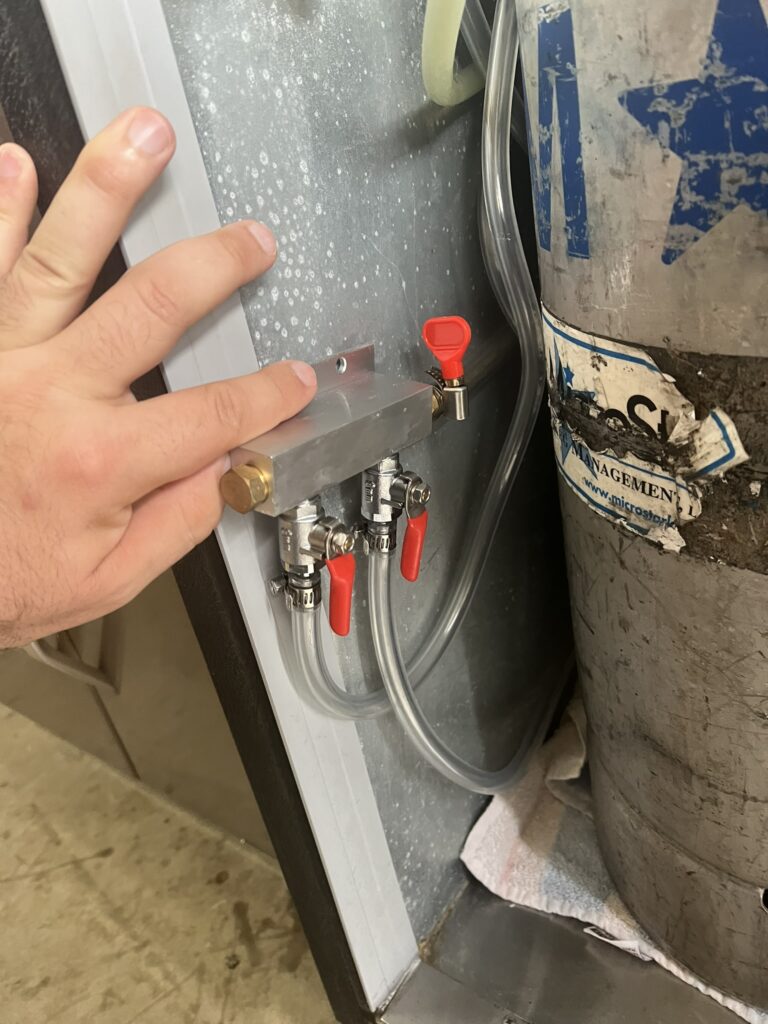
Using the double tap, I had a single regulator with a small Y fitting to split the CO2 to both tanks. I had a difficult time getting the pressures right so I ordered a new regulator. The new regulator basically did the same thing. I then removed the Y fitting and opted to go with a 2 port manifold setup and it eliminated the foaming issue I was having. Also, my new pressure regulator wouldn’t hold a steady pressure and just wasn’t reliable. I highly recommend you get a good regulator and manifold system if you are going to run a double tap.
Tap Handles… It’s fun to experiment with handles. I am looking in to 3d printing my own custom ones so if anyone has any thoughts on that, put them in the comments below.