
After the mixed emotions from the experience with Ultimate Toys and the Ultimate RV, we decided to try our hand at building our own van. Here is the running list with links to all the products. Reviews will be posted once they are installed and in use. We paid for every single product out of pocket so there is no bias in them. Check back often for updates.
Running Totals:
– 2024 AWD Crew Van Sprinter: $91,000 (Quotes below do not include the purchase of a Van! They are for building a van you supply to them)
– Outfitting Parts: $29,823 (as of 5/3/24)
– Installation Labor: $ Pending
– RB Components Quote for similar build: $97,945.20
– Vannon Quote for similar build: $75,552.19
– VanSpeed Quote for similar build: $87,717.71
– Honorable Mention: ROAV custom built vans. These guys will help you do anything. If you want to try your hand at DIY and then take it to them for various parts, they are happy to assist.
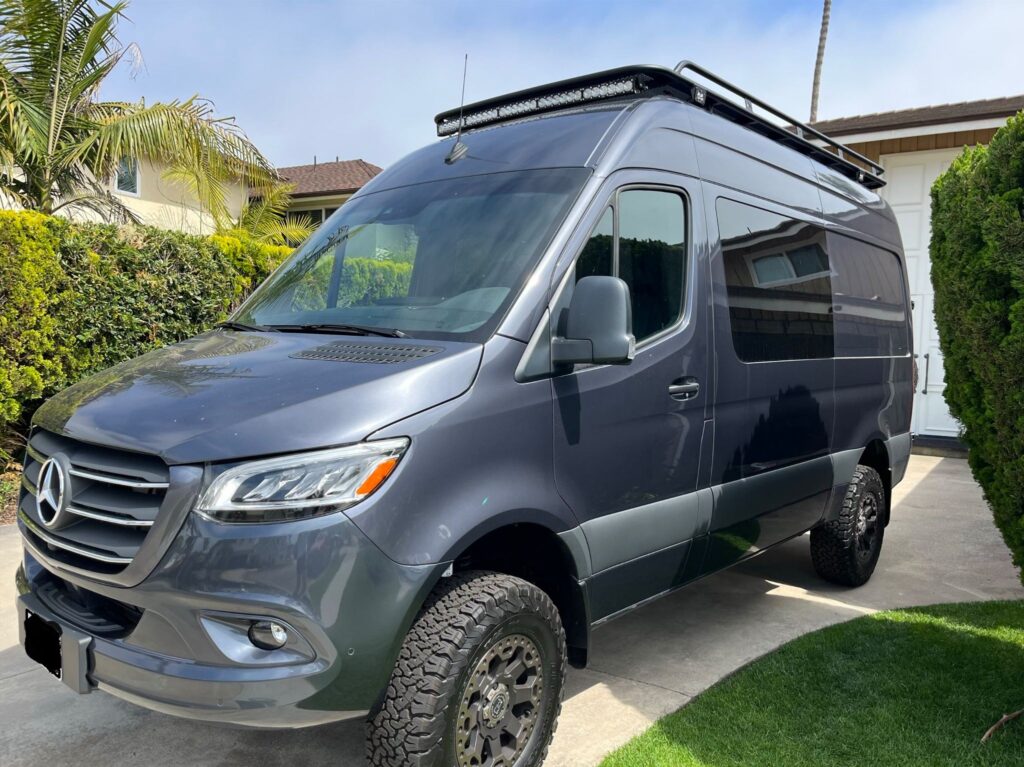
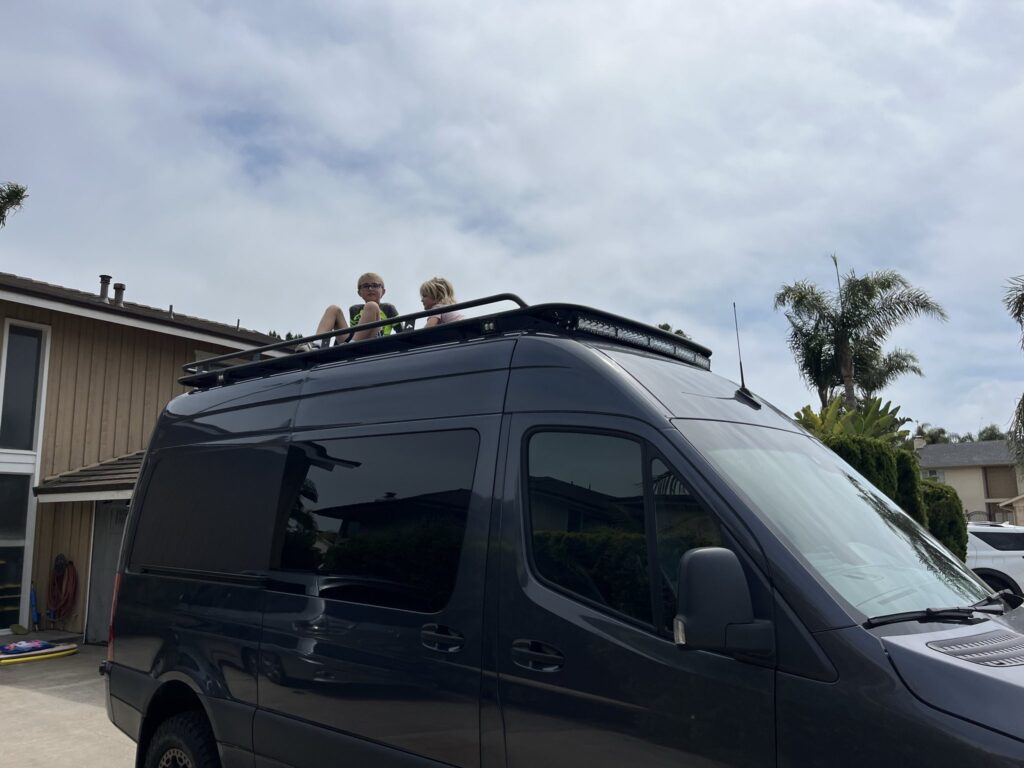
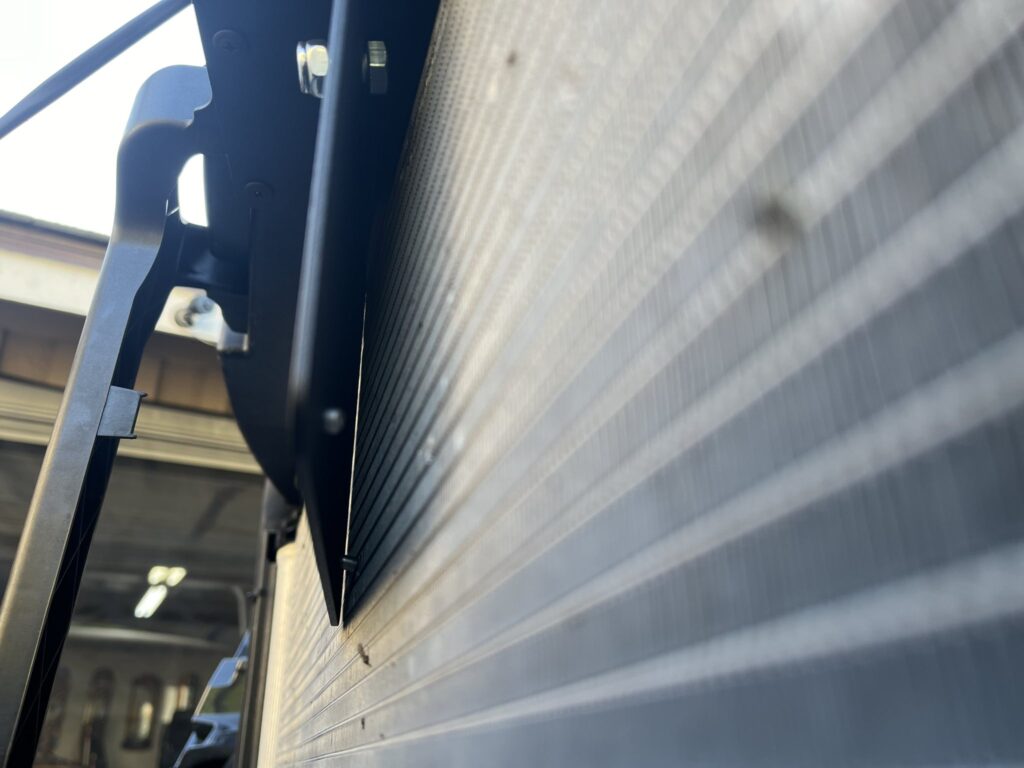
- Aluminess Explorer Roof Rack
- Full Review
- $4500
- Installation: $600
- This rack was ideal given the integrated flush mount side lights and rear lights. We travel through heavily wooded areas in Utah and don’t like worrying about ripping a $600 pod light off the rack if it hits a tree branch.
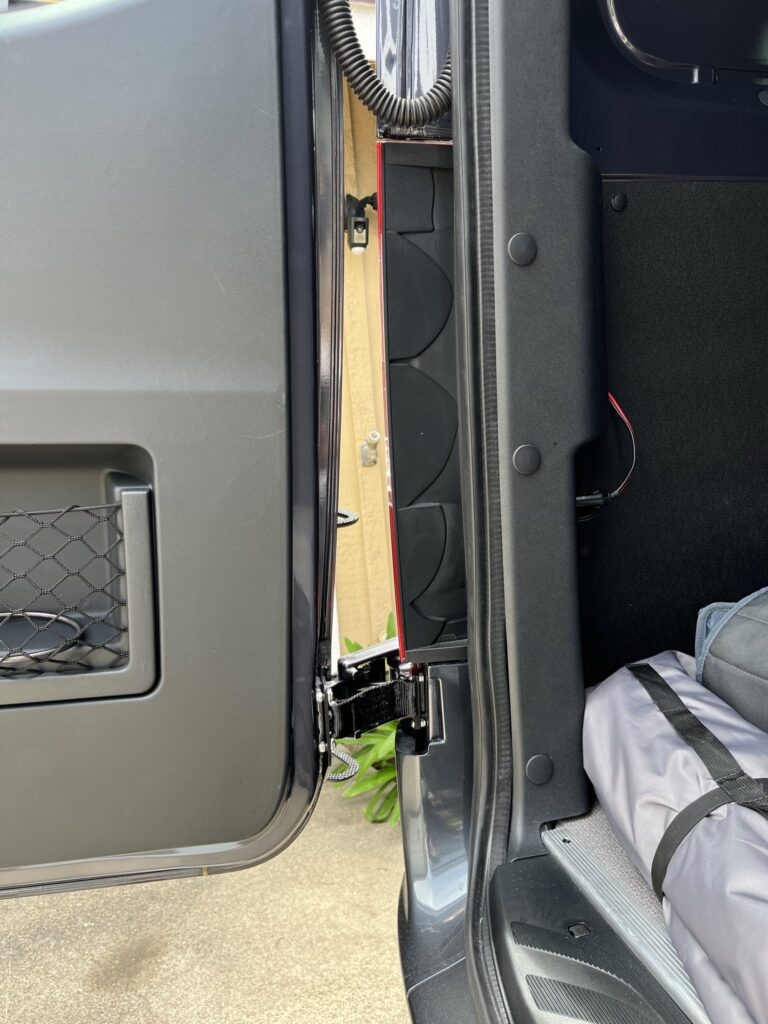
- Aluminess Rear Door Ladder
- Full Review
- $1400
- Installation: DIY
- Specifically wanted a rear ladder option to keep the van width to a minimum. We also wanted to avoid the side ladder due to the roof top tent having the main opening facing out the back. This allows the kids to climb up and down without trying to maneuver around the side of the tent. We may add a side ladder in the future.
- Aluminess was the ideal solution for a ladder. It keeps everything on the rear of the van to keep the sides nice and slim. Most of the rear door accessories require replacement of the 270 degree hinges with the 180 degree ones. This particular ladder came with a limiting strap for the lower hinge so it saves you money by not requiring the hinge swap.

- Aluminess Rear Door tire mount
- $525
- Installation: DIY
- Cosmetic choice. We like having the spare tire on the back for easy access. Also, there was discussion about using the factory spare tire location as possible storage for batteries vs. possible flush mount storage area like the one Van Compass offers.
- Baja Designs Arc 50″ lightbar
- $2155
- Installation: DIY
- The rack was made for this specific light bar. Apparently the arc fits the overall arc of the sprinter windshield better and is a seamless addition to the rack. Overpriced cosmetic but functional upgrade.
- Baja Designs Load-Lights
- $485 x 3(pass/driver/rear)= $1455
- Installation: DIY
- Flush mount lights that were integrated into the roof rack. There is another company called GG lights that are much cheaper but I am unsure if they would bolt into the mounts the roof rack has on them. I didn’t want to risk the purchase so I sucked it up and overpaid for the name brand lights that the rack was built for.
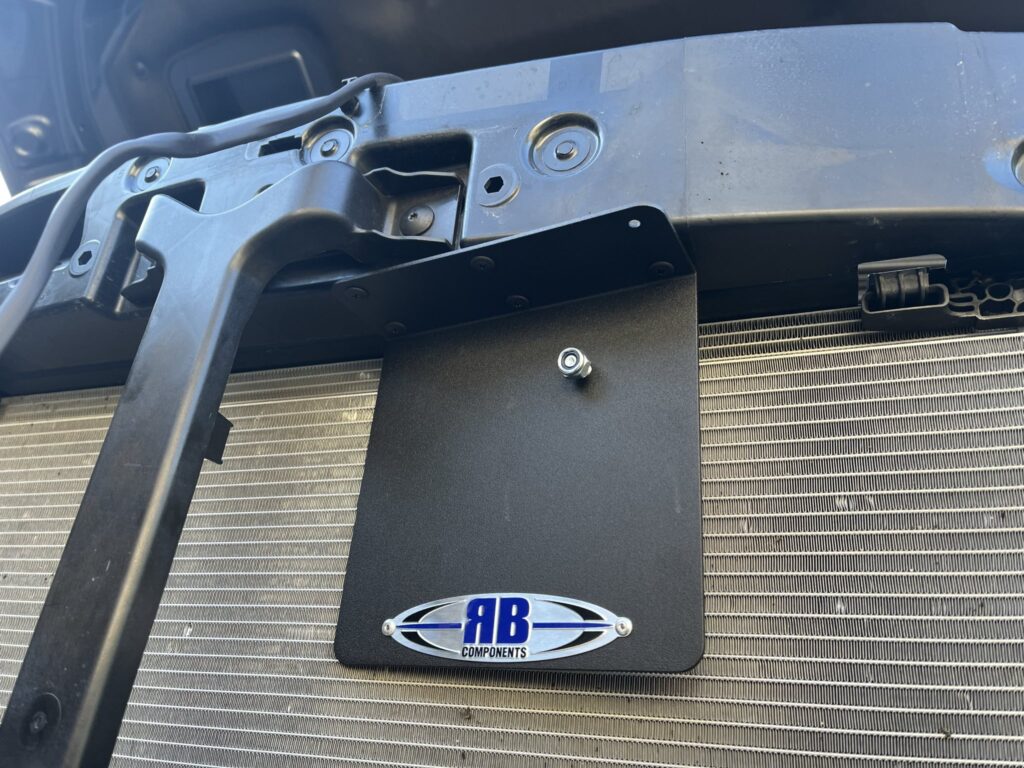
- RB Components All In One Air Horn
- $180
- Allegedly a direct fit for the VS30. However…. if you have an AWD or 4WD version with cameras there is a single post in the middle of the grill where the horn upgrades go. I can confirm that the OWL off road one fits on the 2023 version. I decided to go with this RB components air horn because why not! the install is pretty straight forward but it will NOT fit in the center. You can put it there but only use 3 out of the 6 mounting holes and it is flush against the trans cooler and the brace. There is more than enough room to slightly off set it but you can only use 5 of the 6 self tapping screws to hold the bracket in place. RB Comp had a couple rivets holding on a logo placard that touch the trans cooler. Hopefully they don’t rub a hole in it. Sound wise, its loud as shit. Way better than stock and since I have had the OWL off road PIAA horn, I can say I prefer the sound of this one more. The trade off is that due to the compressor taking a split second to power up, you no longer have an audible horn beep when locking the doors. All you get is the relay click. I am ok with that.

- White Top Adventures Overhead shelf with both curtains
- $436
- Installation: DIY
- Several companies make the overhead shelf or at least offer it on their sites. I purchased from White Top Adventures because they offered the partition curtain and a front blackout curtain. In retrospec, the front blackout curtain is going to be removed. I hate it, the wife thinks its annoying, and having a decent window shade is more than enough. The window shades don’t make you feel so closed in. I would recommend saving the $80 and just getting the partition blackout curtain and skip the wrap around cab curtain.


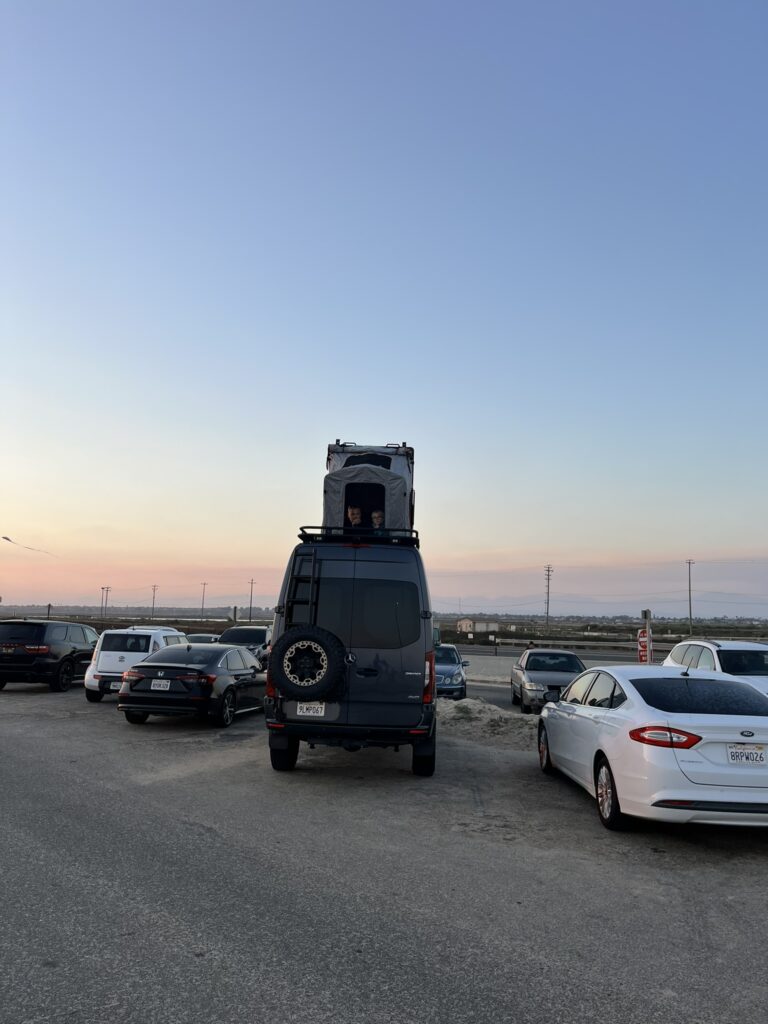
- Hangout Van Awning
- $558
- Installation: DIY
- If you hang out at the rear of your van, this awning is awesome. The ability to create additional shaded space out the back at the beach is perfect. Just back into your favorite spot, set up the awning and enjoy.
- Agile Offroad Black Rhino wheels and BFG KO2 tires x 5
- $3685
- Installation: DIY
- I am not a huge fan of all black wheels but the wife is. The black warlords with a gun metal grey edge was a perfect compromise. Both myself and the wife think it was the best cosmetic upgrade. The BFG KO2’s are probably overly aggressive for street driving and the softer rubber compound will require more frequent tire rotations to keep them quiet. If you do more road driving than off road, you should opt for the Coopers instead.

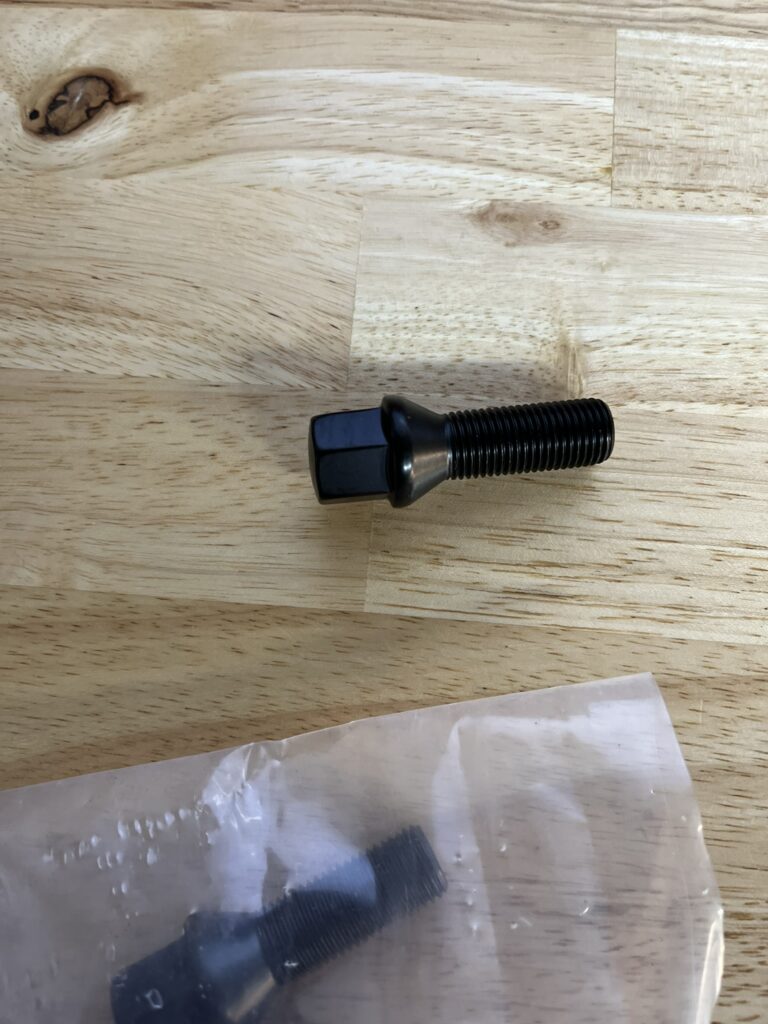
- Owl Vans Lugs
- $80
- Installation: DIY
- Must have the cone lugs if you replace the wheels. The factory lugs are too long and convex shaped. They simply will not work with the black rhino wheels. Don’t forget to change out your tire iron for the correct size. The factory mercedes lugs are 19mm while these owl offroad ones are 17 mm. You can find a cheap new wrench to fit in the factory location on Amazon here.

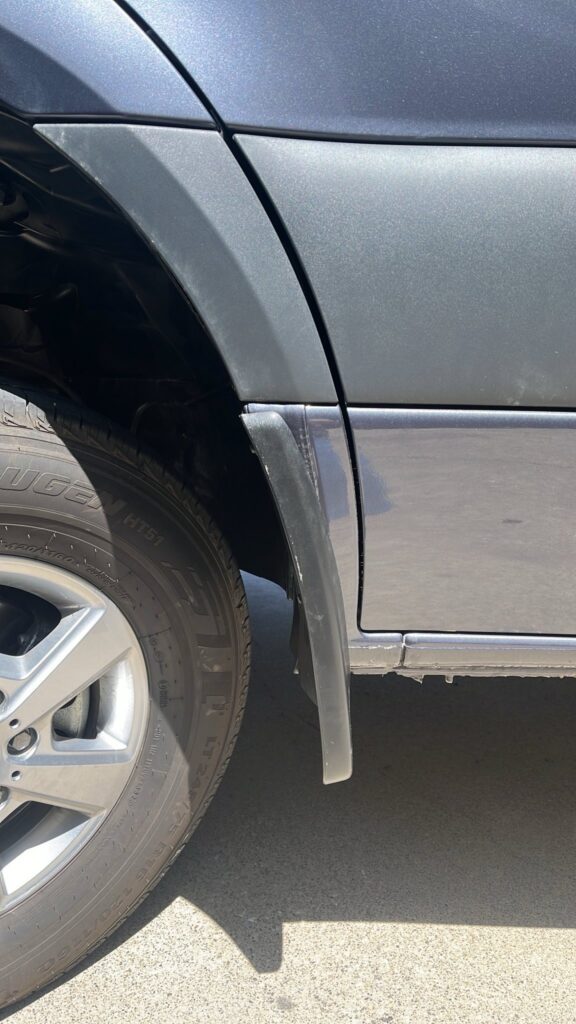
- Van Compass Fender Relocation Kit
- $85
- Installation: DIY
- The fender kit is much cheaper than the bolt on replacement part most people use. If you want to try your hand at chopping up the sheet metal, this kit is easy to do. Worst case scenario you cut too much and then have to buy the other $210 kit. It’s worth the effort. If you have the 2024 AWD van, you do not need to cut the inner fenders for clearance with 275/70/R17. You just have to use this kit to get a little more clearance from the mud flaps. This also gives you the parts to modify all 4 fenders.

- Terrawagen Floor Mat
- $60
- Installation: DIY
- I got the factory mercedes all weather floor mat. Honestly, it sucks compared to the weather tec one. I ended up buying this center walkthrough piece but if I could go back in time, I would have just purchased the weathertec one instead.
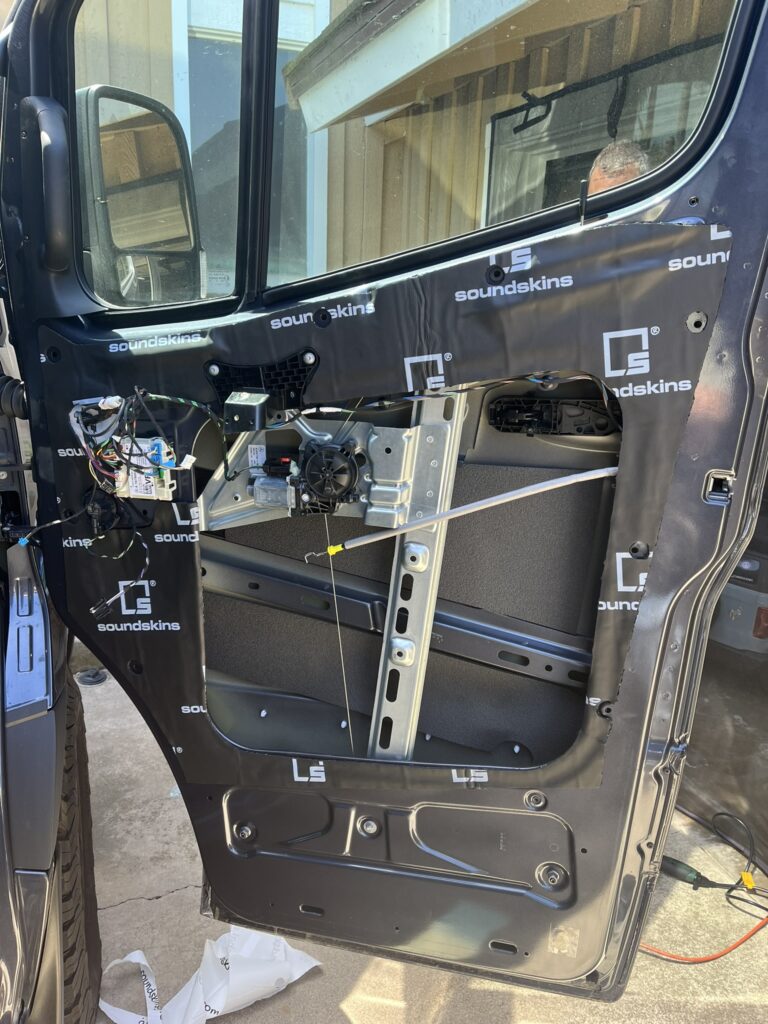
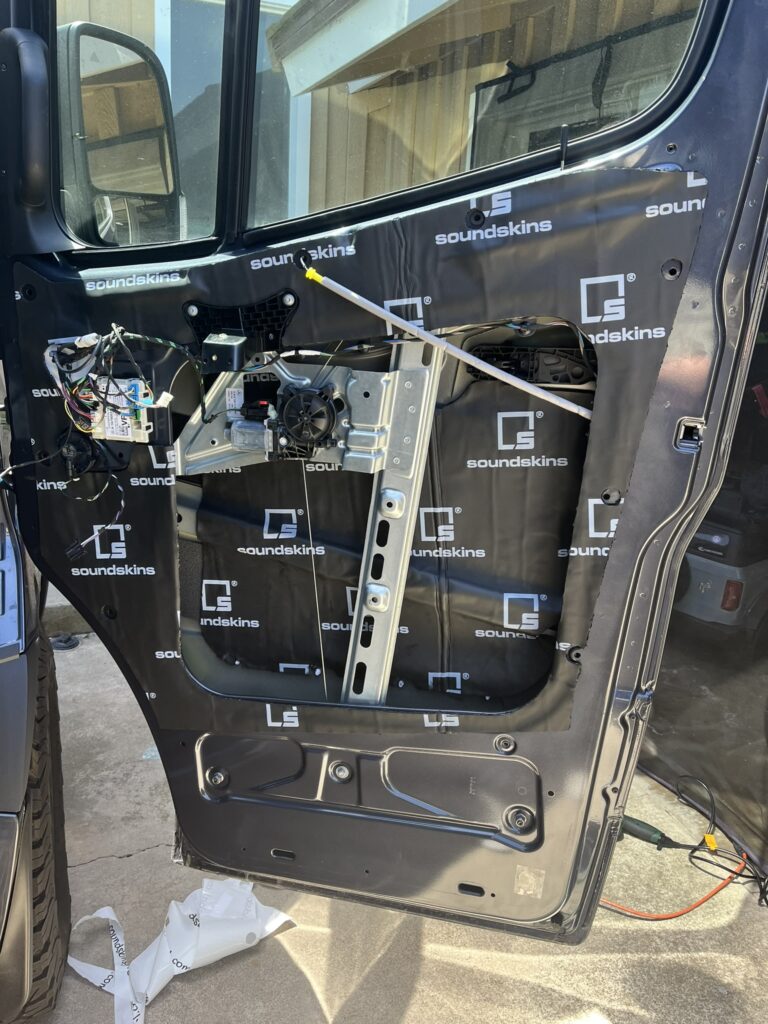
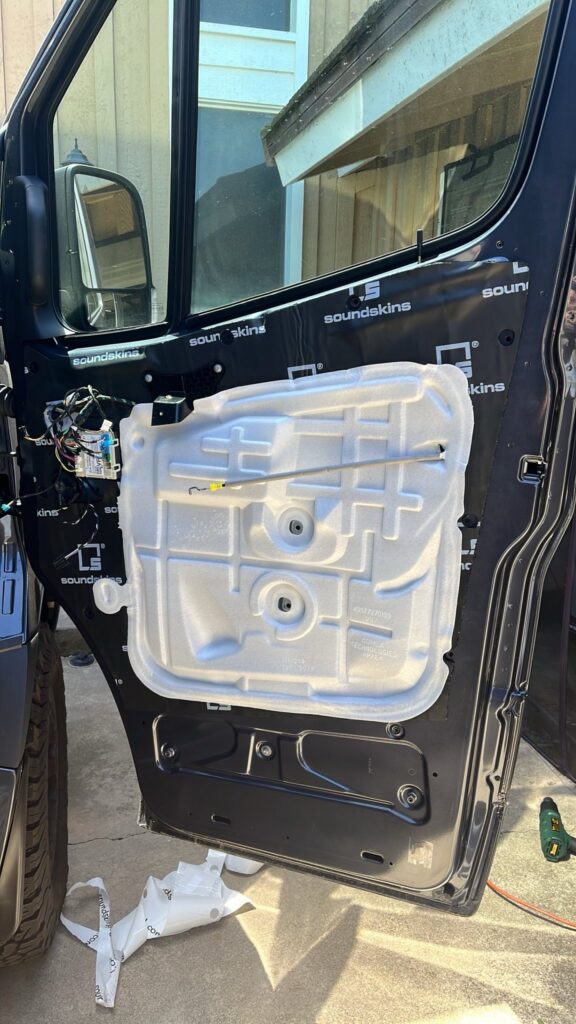
- SoundSkin Sound Deadener 4 door kit
- $383
- Installation: DIY
- This was a pre-cut sound deadener kit for the driver, passenger, and both rear doors. If you want to quiet down some of that road noise, you are going to want to add some type of sound deadener. Sure you can find cheaper products that do the same job but honestly, a precut option is a huge time saver and much easier to install with the kids.
- 4/30/24 Update: Soundskin kit was installed on all 4 doors. The product material is top quality but the “pre-cut” marketing is more like a “pre-stamped” but you have to cut it out. It’s a bit of a pain in the ass and the front door lower panels didn’t have the bolt holes cut out in them. I wasn’t aware of this until I got the door panel back in place and was aboutt o secure it with the bolts. Realizing there was soundskin blocking the hole. I had to disassemble the door panel, peel back the soundskin and then cut out the spot for the bolt holes. Also of note, the material was slightly too large and stuck out about an 1/8th inch on the front edge of the door panel. I had to use a utility knife to trim it back. Overall, it was a good product but could use better quality control to make sure their “pre-cut” process actually cuts all the way through the material and cuts out all necessary holes.
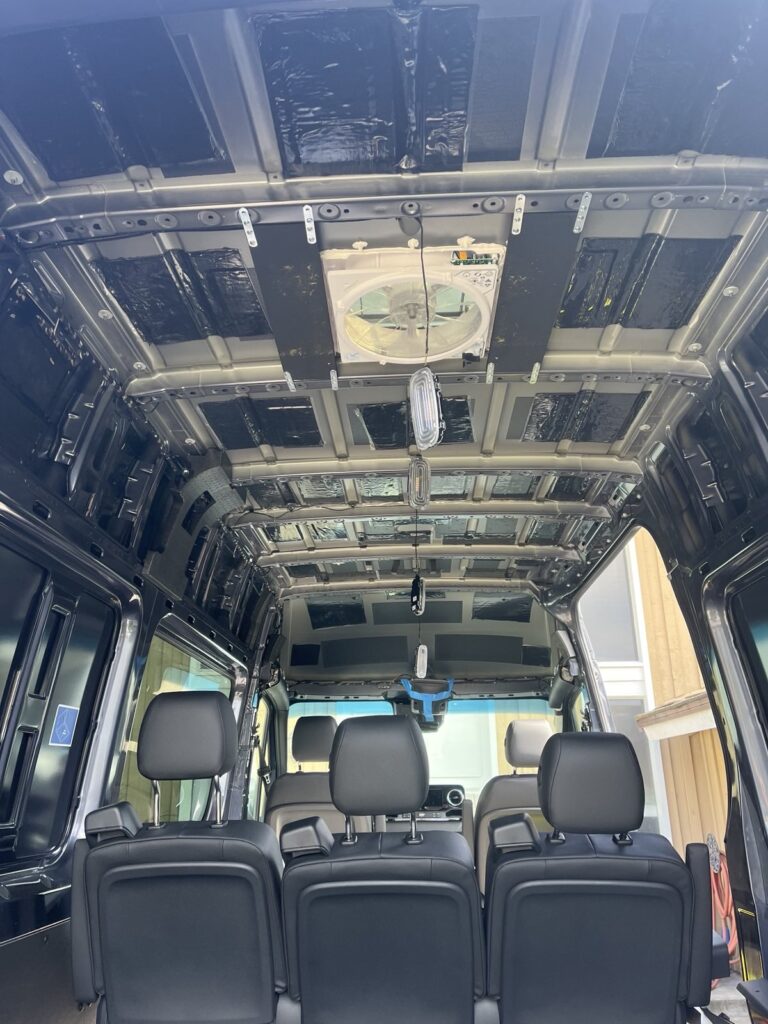
- Vanlife Outfitters 3m Thinsulate
- $462 (55 feet)
- Installation: DIY
- I spoke with several van builders like RB Components, Vannon, ROAV, VanSpeed, and others. RB Components recommends the rockwool insulation due to its sound deadening and fire resitance properties. Pretty much everyone else recommended 3m thinsulate to me. I have no idea if one is better than the other but I had a hard time finding any reference for which rockwool to get or how to go about installing it. I opted for the 3m Thinsulate because I could find several tutorials on how to do it. It’s not really complicated, but it is always helpful to know have a video to fall back on when you get stuck.
- This stuff cuts with scissors and packs into every crevice easily. It came vacuum sealed in giant sheets. We opened them up and cut to fit every spot. Will need to get the 3m spray adhesive to secure it to the van wall.
- Vanlife Outfitters Low-E Reflective Insulation
- $385 (50 feet)
- Installation: DIY
- A good sound deadener and thinsulate would likely suffice. This is what most people have done based on all the videos I have seen online. A few sources recommended adding the Low-E reflective insulation layer as a vapor barrier and thermal barrier as well. This layer can be used as insulation for the floor since it can be compressed. If you want to use thinsulate on the floor, you would need to build a subfloor to create the air gap.
- We used “Boom Mat” as a sound deadener in the space between ribs in the floor. We then cut out the Low-E Reflective thermal barrier to insulate the floor. There are several debates ongoing in various online forums about using this type of insulation. Is it necessary… No. I chose to do it because I had already purchased it and wanted an additional layer to help reflect the heat from the floor back out and add an additional sound deadening layer. Numerous people talk about creating a “micro climate” and creating rust faster than normal but honestly, I am more worried about sound and heat than I am rust in my floor. I would rather risk the “micro climate” while trying to stamp out noise during my road trips.
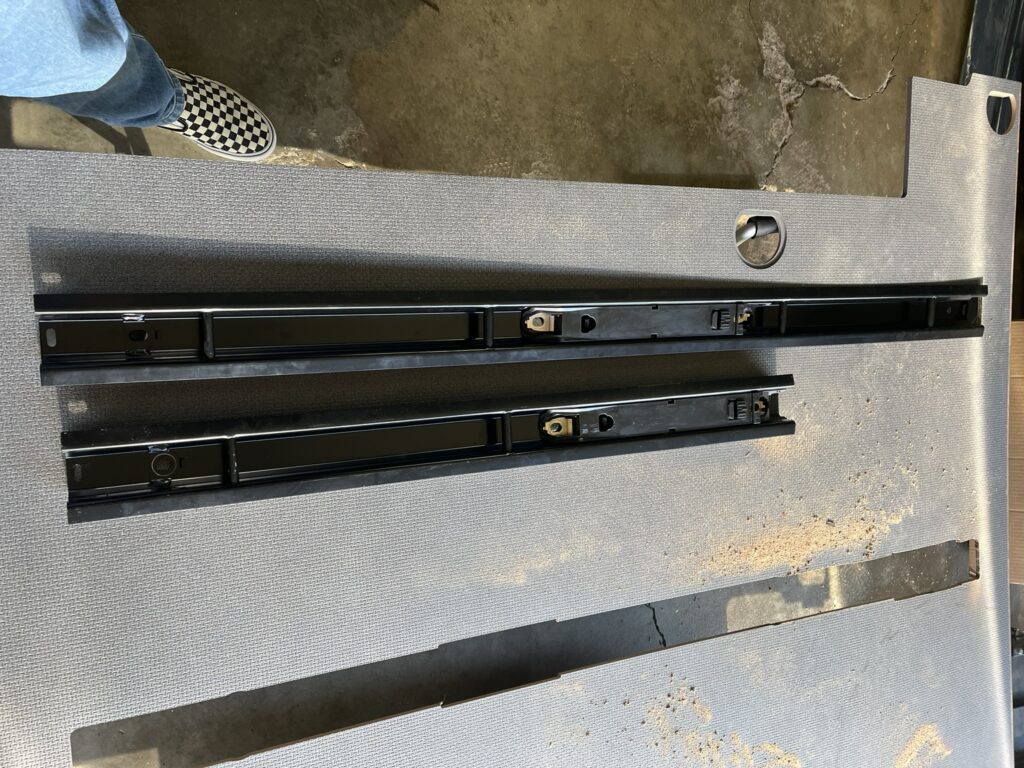
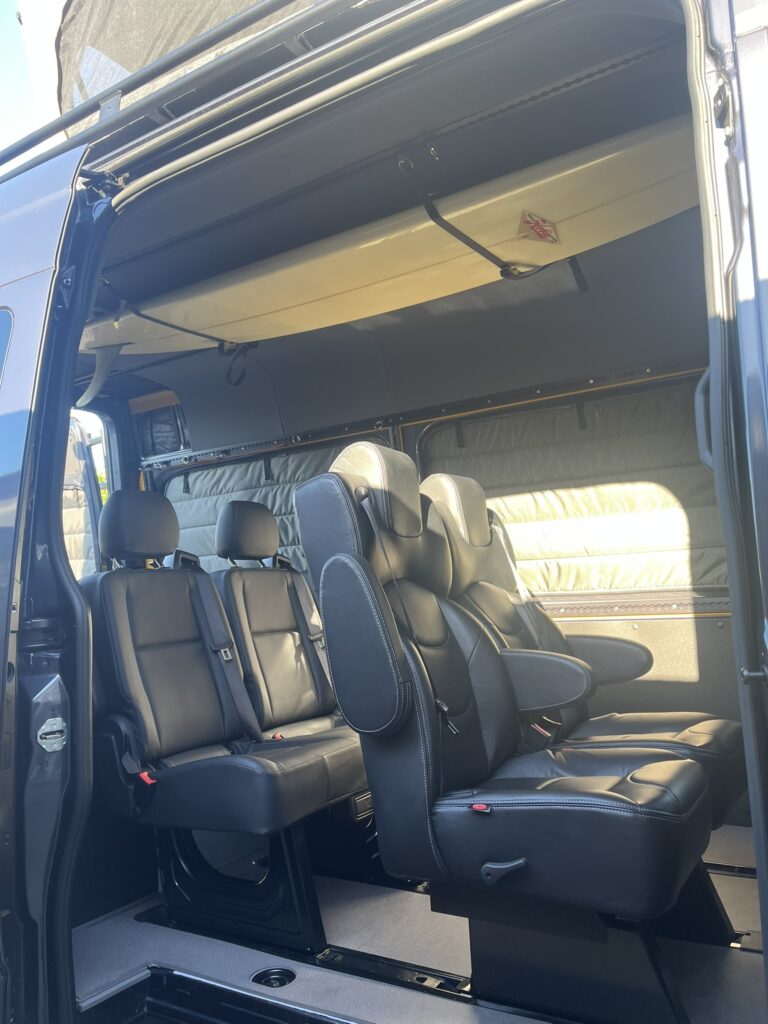
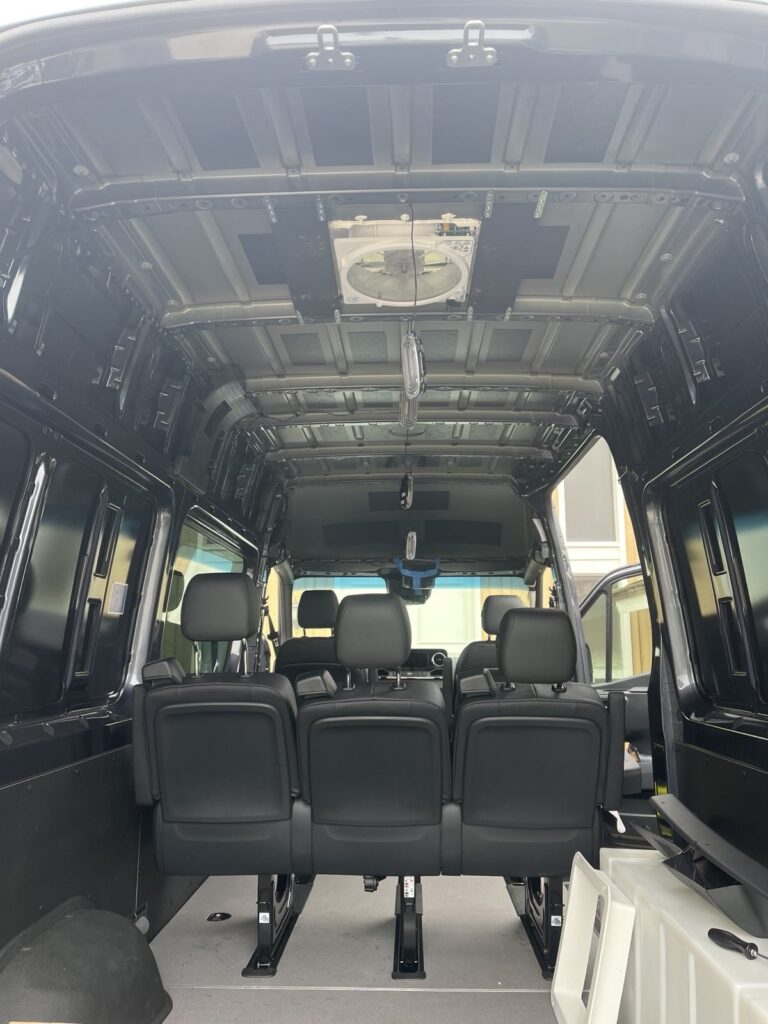
- Mercedes Sprinter Passenger Van Seat Tracks
- $1200
- For the VS30 vans if you want to add an additional backseat with a factory seat track in a Crew Van, you need the following part #’s
- 907-950-70-03-9120 Seat slider (track) quantity 3
- 910143-012008 Bolts for the seat track quantity 3
- 907-836-03-00-9051 Trim Cover quantity 3
- 907-836-04-00-9051 Trim Cover quantity 3
- These parts allow you to replace the single rear seat row seat track with a double row seat track. The crew van has the factory threads under the floor for the additional bolt. You need a 9/16″ drill bit to drill out the additional hole when adding the new tracks. Remove the flooring, lay the new seat track in place matching all the other bolt holes, mark off the last hole and drill a hole through the floor. You will find the threads ONLY ON THE CREW VAN. If you have a CARGO van there will be no threads there and you will need to do additional work to install a rivnut.
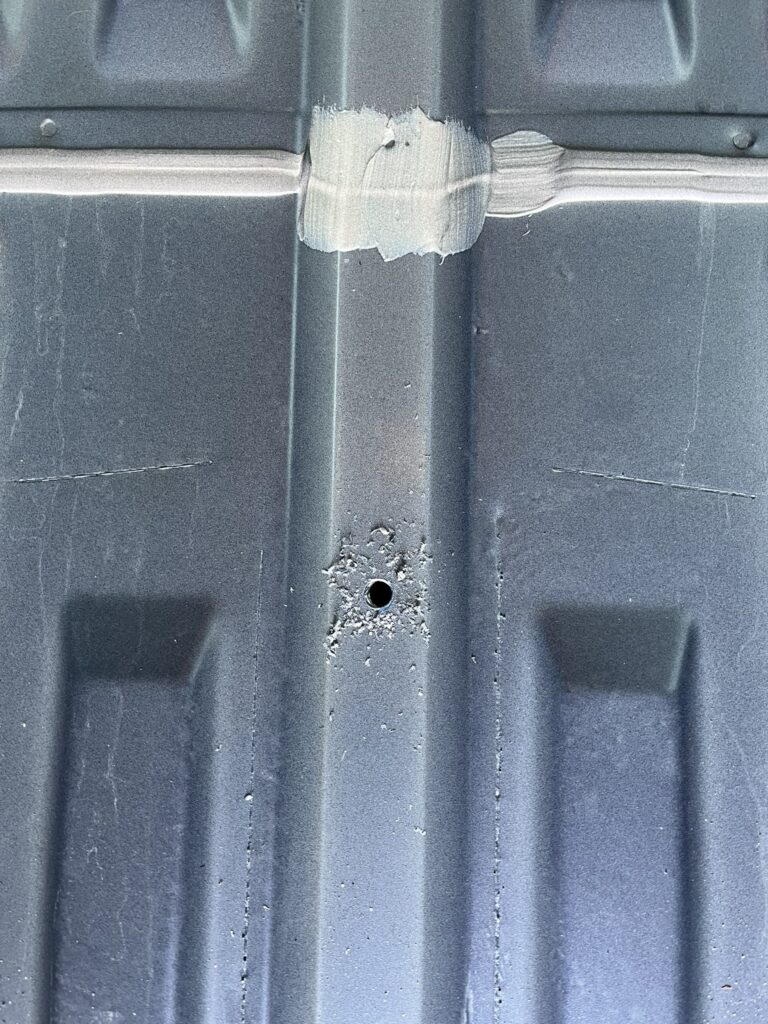
- Drill out the holes, and then cut out the additional space in the flooring.
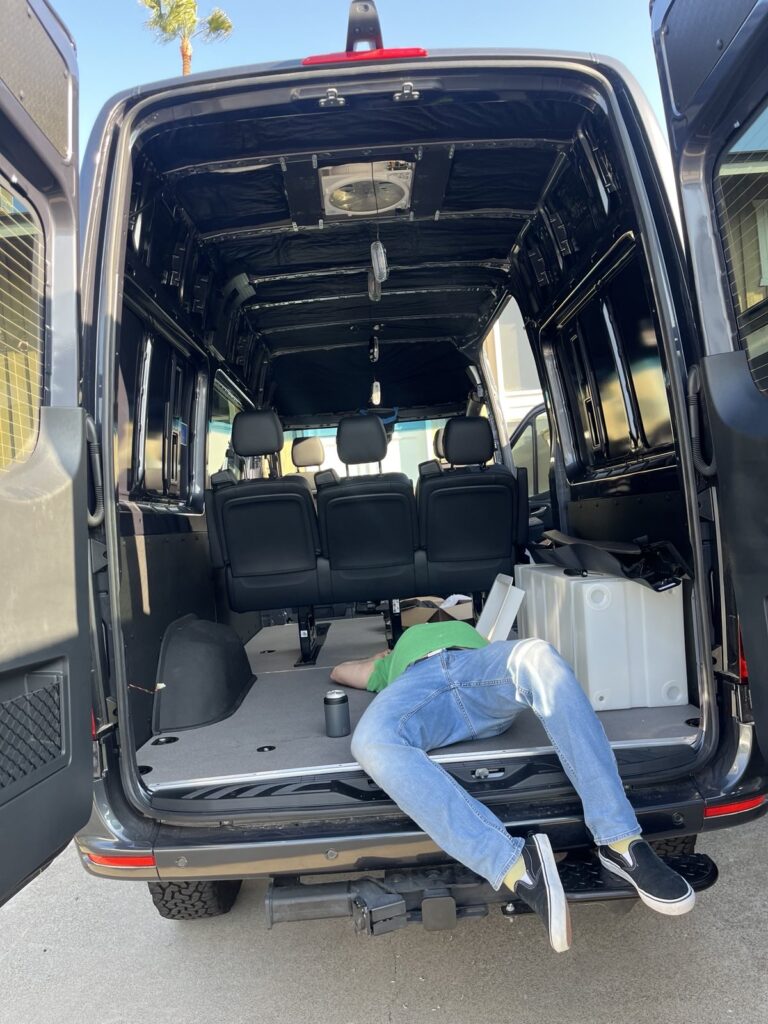
- Vanlife Outfitters 20 gallon water tank
- $299
- Installation: DIY
- Our van is mostly used for beach trips, road trips, ski trips. We do camp but having things like a sink or indoor shower was not a big deal. We had a full kitchen/bathroom setup in the Ultimate RV model and we never really used it. It just wasn’t practical. We did however use the exterior shower all the time. Mostly to rinse after surf, rinse gear, or hose off the kids before driving home. Our goal is to have a shower at the back of the van for external use with hot water.
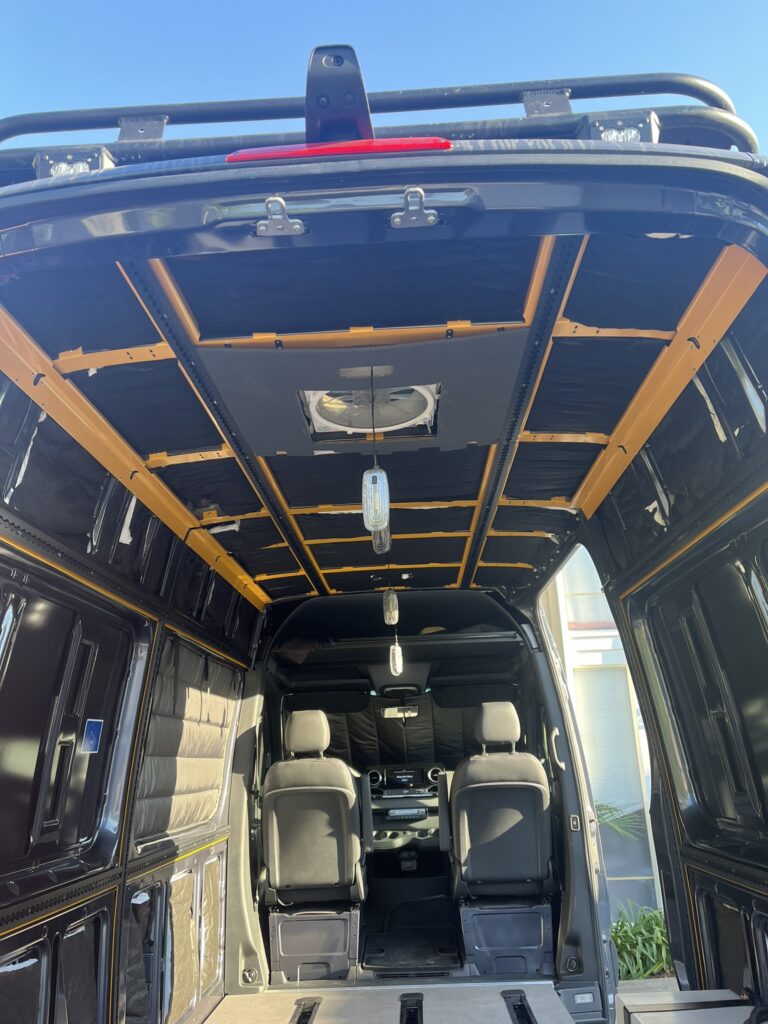
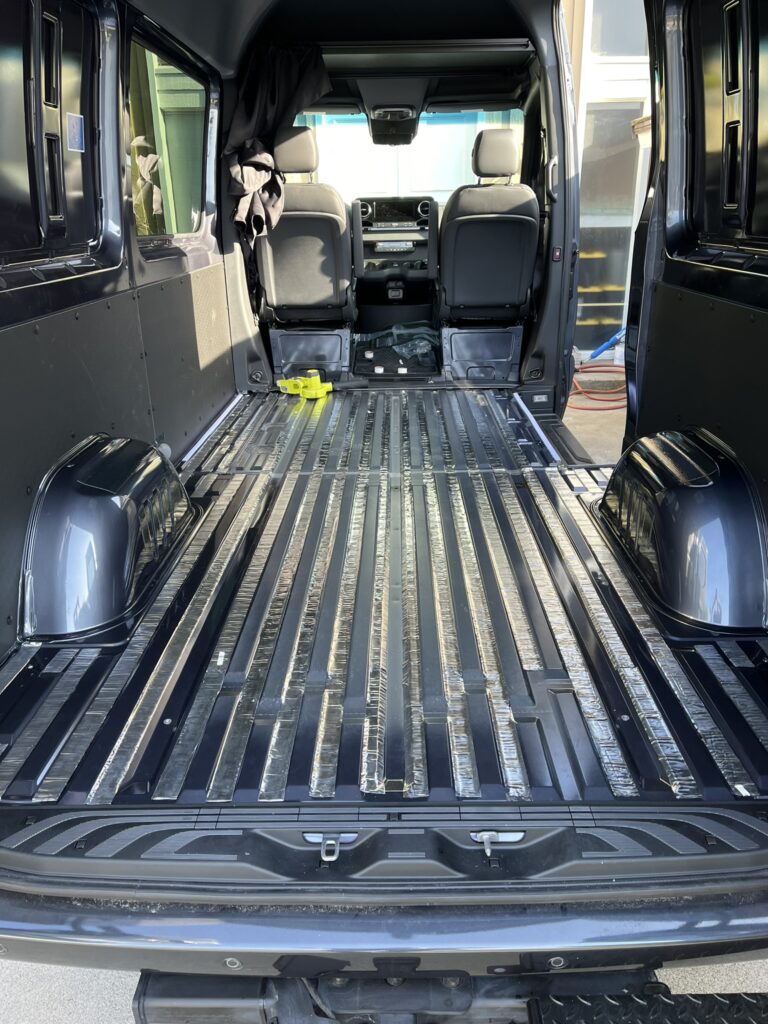
- Vanland Lost Highway Builder Foundation Kit
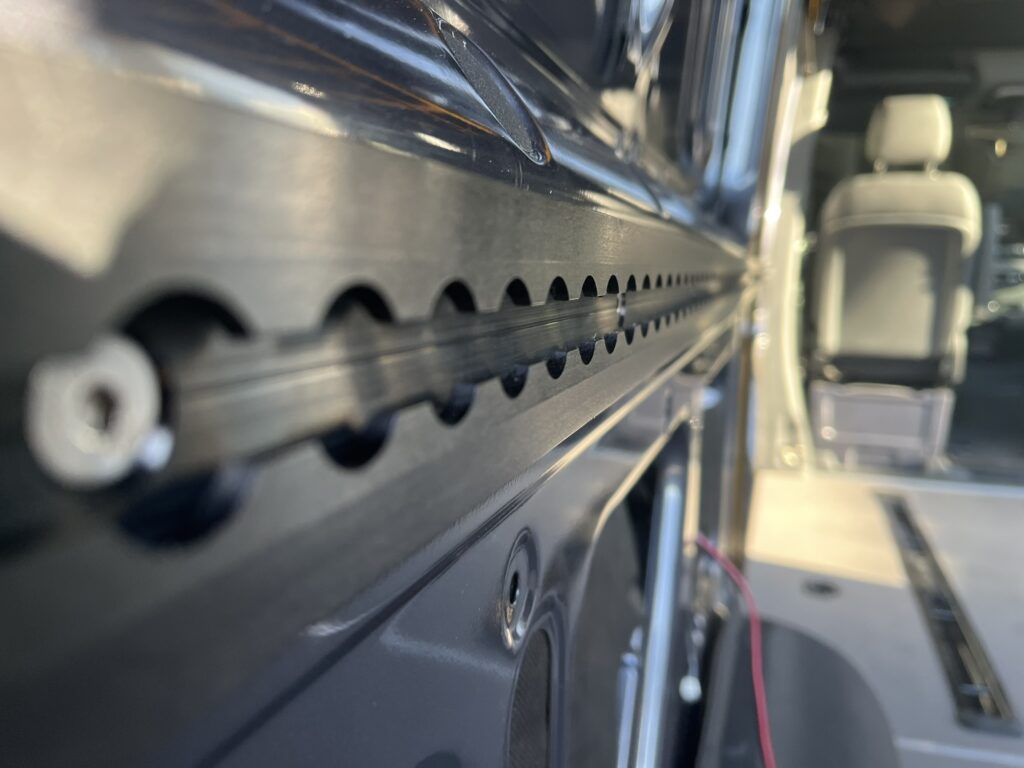
- $3664 (anodized black)
- Installation: DIY + $300 or $3200 and
- RB Components had a similar kit for bracing the walls and interior furniture. The Lost Highway kit was thicker galvanized steel and had the L-track with it as well. You could buy individual pieces but this kit was perfect for our needs. It had the L-track for the MOAB elevator bed, L-track in the roof so I had tie down points for a surfboard, and L-track in the walls to tie down everything else. Its the perfect setup unless you are really wanting a full shower/kitchen setup. In which case, you are better off going with the RB Components.
- Special note: You are going to want to invest in an air rivet gun and rivnut setup. The install requires a couple hundred rivets. Doing this by hand is not worth the effort. I was going back and forth about paying someone for the install vs. buying the tools. The tools set me back about $300 on amazon. Specifically, you need a rivnut mandrel for a 6mm rivnut and a rivet mandrel for a 3/16th rivet. This is the kit I ended up purchasing.
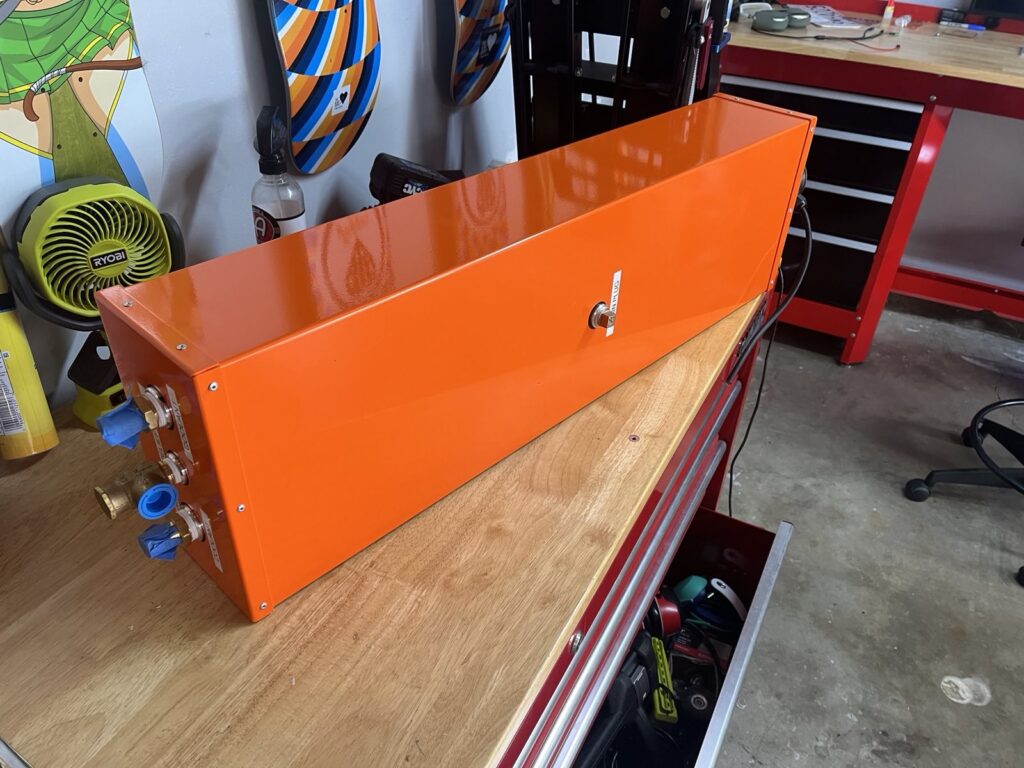
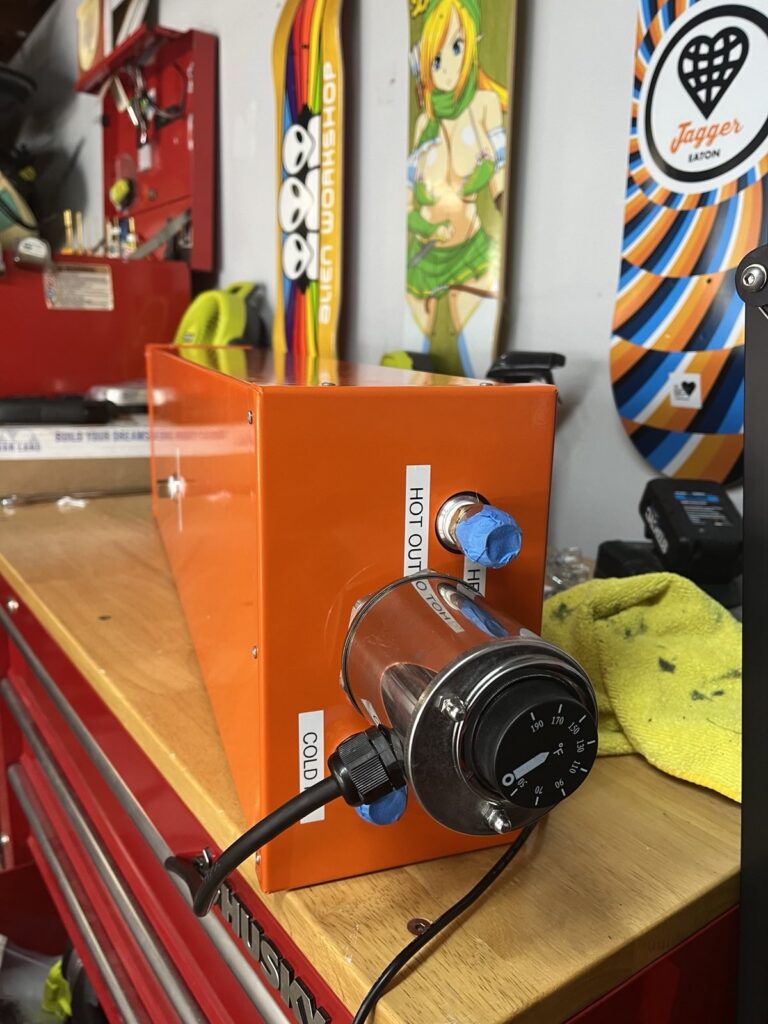
- Vanland Incline Engine water heater
- $2500 (with passenger side install kit)
- Installation: DIY
- Choosing a water heater was difficult. Tankless vs. tanks or gas vs. electric. We chose to go with this engine heat transfer one because it has an insulated tank. It takes zero energy to heat the water when driving and keeps the water hot for up to 12 hours. It also had the secondary electric heating element that we could use when parked in freezing conditions to keep the tank and lines from freezing. Espar has a hydronic heater that would do essentially this same thing but it runs on diesel fuel. The concept of running a diesel heater in a confined space makes me nervous about carbon monoxide. Espar makes quality products but we opted to keep the diesel heater on the list of possible upgrades later.
- A couple of nuances here. The electronic heating element has NPT (tapered) threads while the heater has NPS (Straight) threads. I chased the threads with a tap/die set which is 1″ by 11.5 NPS for the bung and NPT for the element. I then added teflon tape and the thread sealant paste to tighten it up. Its not the end of the world if only a few threads create a seal due to the low pressure system. It is more of a design flaw and something to be aware of if you are trying to tighten things down and get worried about the tension on it.
- The next nuance is the mounting to the chassis. The outer side mounts against the frame rail but you need to make sure you push the mount so the lip is flush, otherwise the tank will slide back and forth. The inner edge doesn’t sit flush with the frame rail and has about a 1/4″ gap. I ended up adding some hard rubber straps to help grip and hold the tank in the straps as a safety precaution. Here is a link to the rubber I purchased. I highly recommend using something like this to ensure it is secure. cut it to length and stick it to the mounting straps where it meets the bottom of the tank, then put a strip along the top edges where it meets the frame rails. I double layered the inner edge to ensure strong contact.
- Vanland Essential water system builder
- $185 (pump/accumulator/filter)
- Installation: DIY
- Nothing special about this. Its a water pump, accumulator and a pre-filter to help save the pump from contaminants. It happened to be cheaper to buy this kit than it was to buy individual pieces.

- Upfitters Resource Sound Damping Kit for walls and ceiling
- $316
- Installation: DIY
- This is a pre-cut kit to install sound deadener in the cavity spaces. It takes the guess work out of the sound deadener. RB Components recommended a spray in sound deadener using noxudol 3101. I was going to have them do this for me but scheduling proved difficult and I ultimately just ordered this kit and the one below.
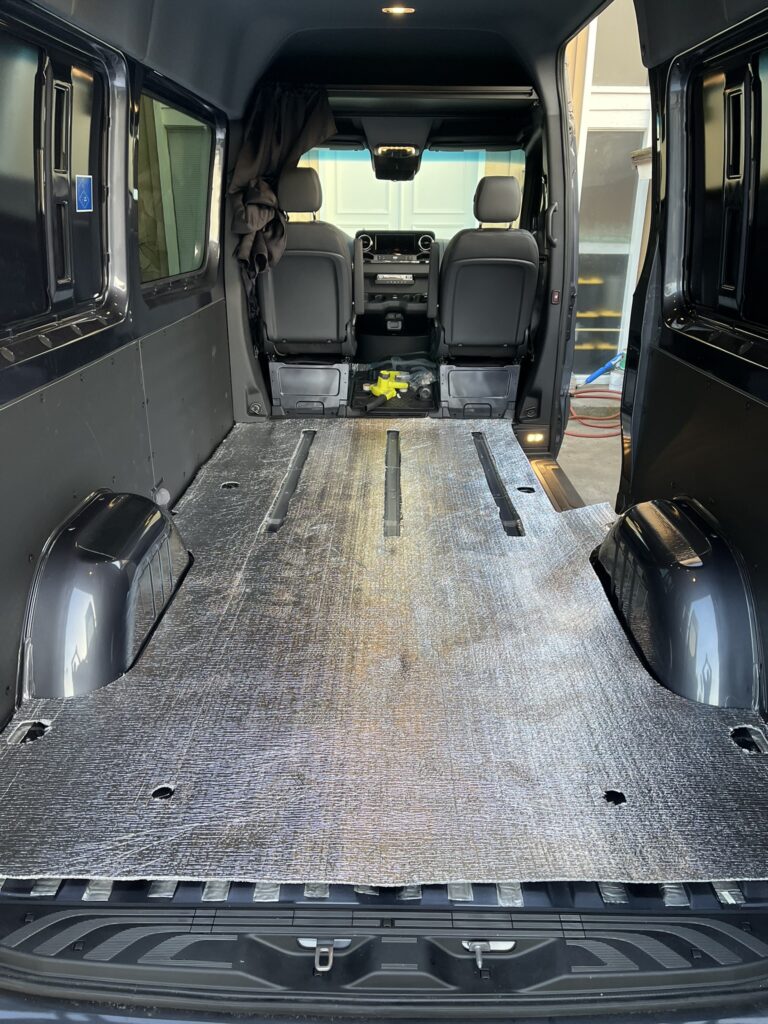
- Upfitters Resource Sound Damping Kit for Floor
- $293
- Installation: DIY
- We chose this kit due to the precut sections for insulation. What we received was rolls of 1.5″ sound deadener “tape”. It was super easy to work with and we were able to stick it down and roll it out without issue. This was much more user friendly than I had thought it would be. I highly recommend this product.

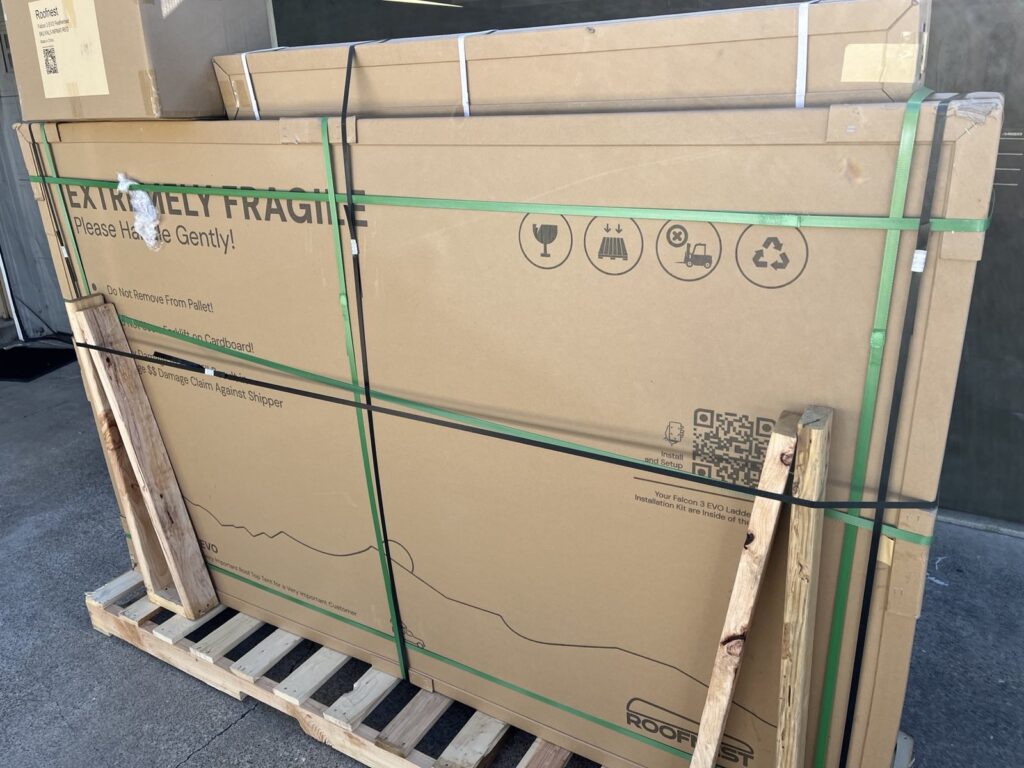
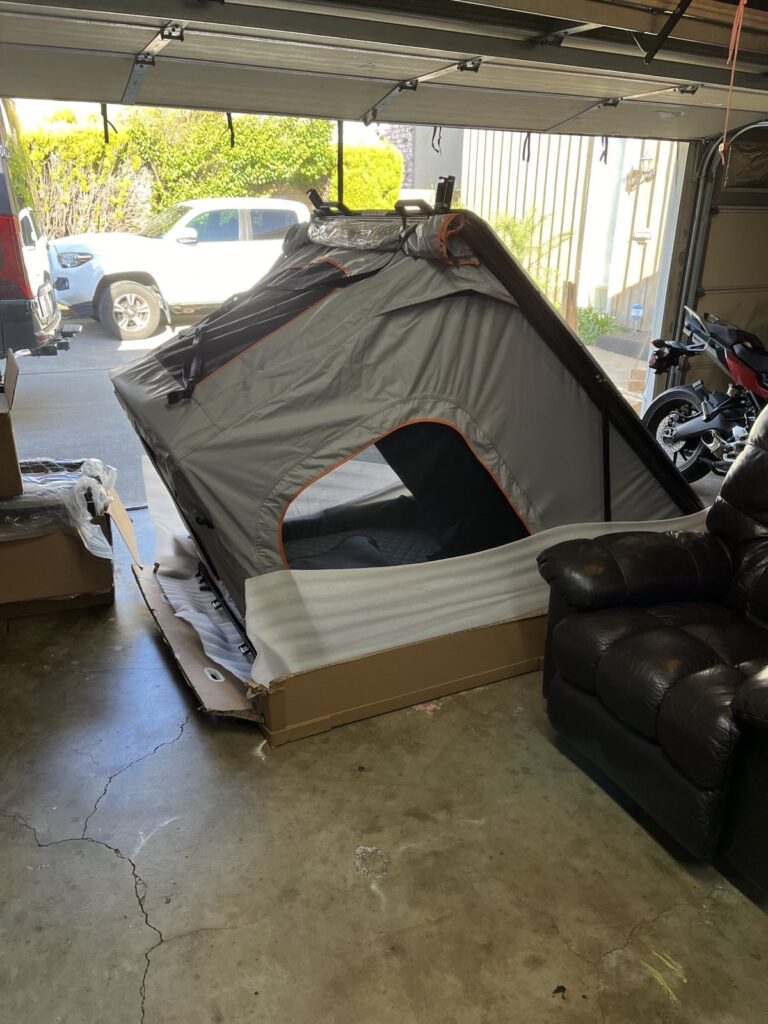
- RoofNest Rooftop tent, Falcon 3 EVO
- $3495
- Installation: DIY
- We are planning on solar panels for the roof rack. This would eat up a lot of real estate on the rack. If we are paying $4500 for the rack, we want to make sure we get to use it as much as possible. So we decided to get a roof top tent. We chose this one due to its size and ability to install solar panels on top of it.
- Roof Nest originally tried to send me two units but I was nice enough to call them and correct the mistake. I would feel bad about getting $4500 worth of free stuff. They were cool about it but on the flip side, their customer support has yet to respond to a question I asked regarding the latching mechanism. If you flush mount it to a flat roof rack, the latch hits the rack and will not open. You have to shim the mounting of it so it will open properly.
- The tent itself is great. it shipped in a massive box with hard 1/8″ wood sheets shielding it from damage. They open easily and setup is a breeze. The kids are super happy with the tent and cannot wait to start using it.
- RoofNest Rooftop tent mattress
- $FREE with tent purchase, normally $275
- Installation: DIY
- I wasn’t really wanting an additional mattress since the tent comes with a memory foam insert already. When a company offers you something for free, in general, take it. If you use it, great, if not, well… donate it to someone who will use it.
- RoofNest Rooftop tent roof rack
- $199
- Installation: DIY
- We needed a way to mount solar panels. This rack mounts to the tent and will allow the panels to move with the roof of the tent when it is setup. We can use the full roof rack for its purpose while still having the panels for charging.
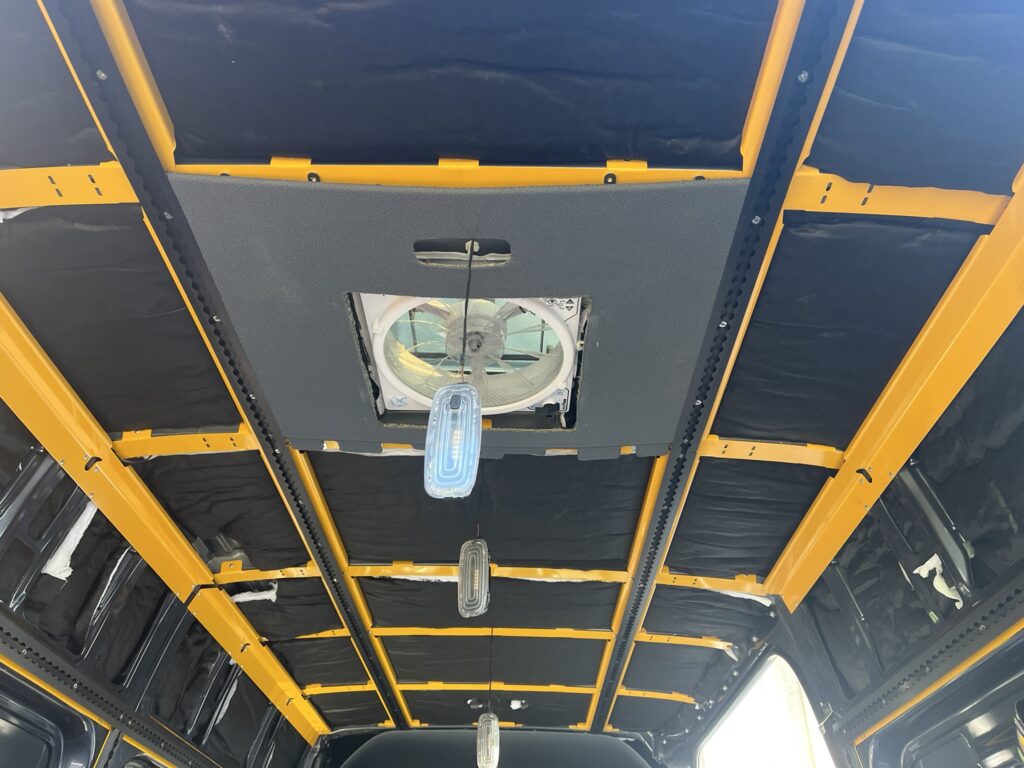
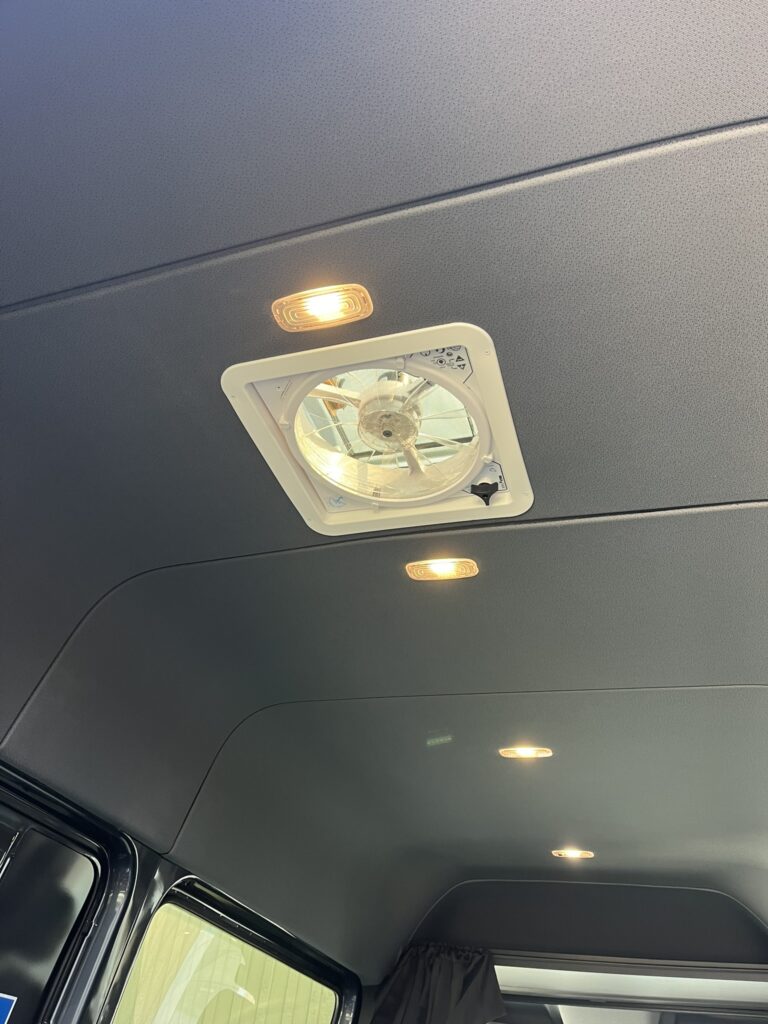
- Maxxair roof vent fan 4500K
- $295
- Installation: $ 240 (Billy at ROAV offered me $200, but I gave him $240 because it was well worth it!!
- This is the lower profile option compared to the standard maxxair fan everyone uses. I wanted to keep the lid under the floor of the rack when closed. This would allow us to still use the rack space without crushing the roof of the vent. When nothing is on the rack, we can still open the vent and get some air flow through the back of the van. Ideally it would have been nice to have two roof vents but the tent will cover the front vent location. We decided not to cut the hole in the roof for that one.
- The install isn’t the most difficult to do but framing out the fan and sealing it makes my OCD go crazy. I am always paranoid I will mess it up and the roof will leak. I decided to let the professionals over at ROAV custom vans do the install for me. The price was cheap enough that it made sense. Super happy to have these guys in my back pocket to help me out when I need something.
- Quest Overland Window Shades – READ BELOW BEFORE PURCHASING!!
- $1208
- Installation: DIY
- I have purchased window shades from them before on a prior Sprinter Van. They were awesome. However, I had read rumors on sprinter-source.com that the company was sold in September of 2023. I went ahead and ordered shades for this van back on 3/24/24. The website said they would ship within a week. 3 weeks came and went and no shipment or contact from the company. I reached out by email to three different people at the company and received no response. The phone was no longer working. I contacted my credit card company and disputed the charges. I am not sure what happened to the company. They used to be great but now they are a complete unknown. I would recommend using XPLR Outfitters if you are looking for quality window shades. Once my credit card dispute process is completed, I will be buying mine from them from now on.
- ECO Flow Electrical System
- $7800.03
- Installation: DIY
- After going back and forth about the victron and eco flow systems, it seemed like the ECO flow was a better option. The amount of money involved is slightly more but the DIY install is so easy when you have a dedicated place to mount it. ECO flow uses a 48 volt system that is converted to 110v or 12v depending on which part of the distribution block you use. It removes the hassle of trying to tie together various components for your application. The downside to it is the larger foot print. Systems like victron have many components, but their small foot print allows to mount them in various configurations. ECO flow is basically 3 large boxes that can only fit in so many locations. It will limit your choice of rear dinettes and couches for sure.
- We decided to utilize a shore power plug, alternator charging, and added 200 watts of solar charging to maintain battery levels. Currently the only electrical draw is the 12 volt water heater to keep the hot water tank from freezing if parked during winter, the roof top vent fan, the water pump, 6 baja designs load lights. Eventually we will have a microwave and some additional interior lighting. On the 110v side we have 3 outlets for plugging stuff in. It is likely overkill for our build but it gives us endless options to expand if needed. More importantly, I don’t have to worry about leaving something on.
- ECO Flow Solar Panels
- $200
- Installation: DIY
- Having the roofnest roof top tent installed on the roof rack gave us the ability to put a rack on top of the tent for solar panels. ECO flow makes 100 watt panels that fit perfectly. The 200 watt kit includes 2 panels and the mounting plates. To adapt the plate to the roofnest rack we had to drill out the holes to fit the larger bolt through it but it was a 5 minute fix and then a direct bolt on.
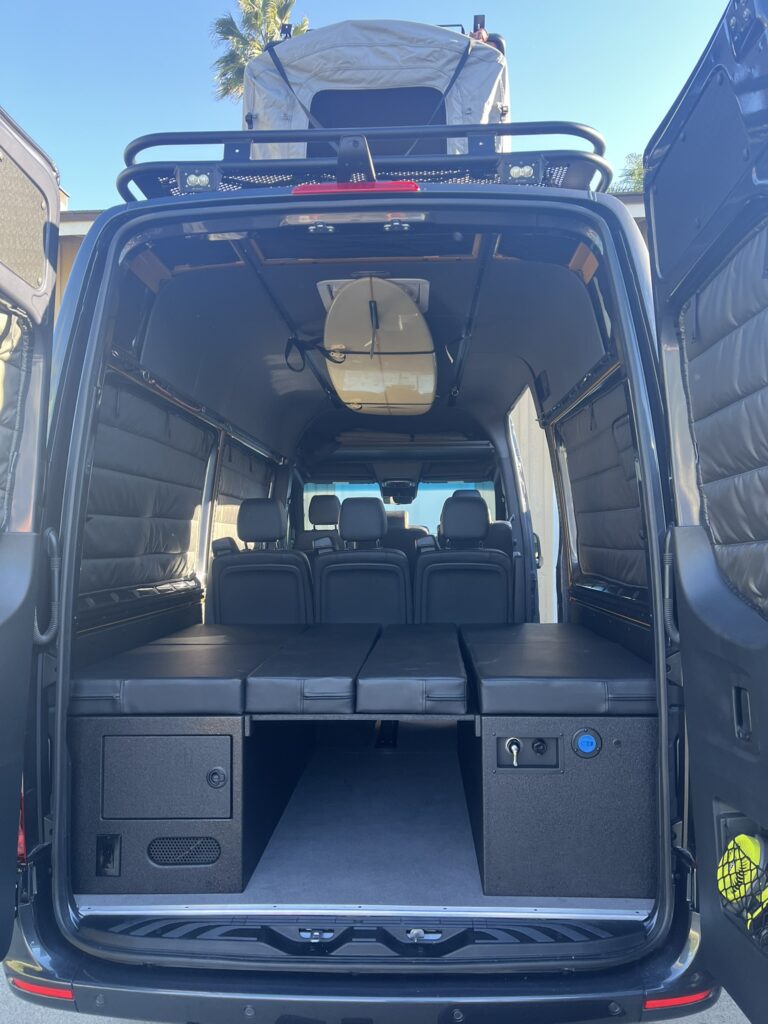
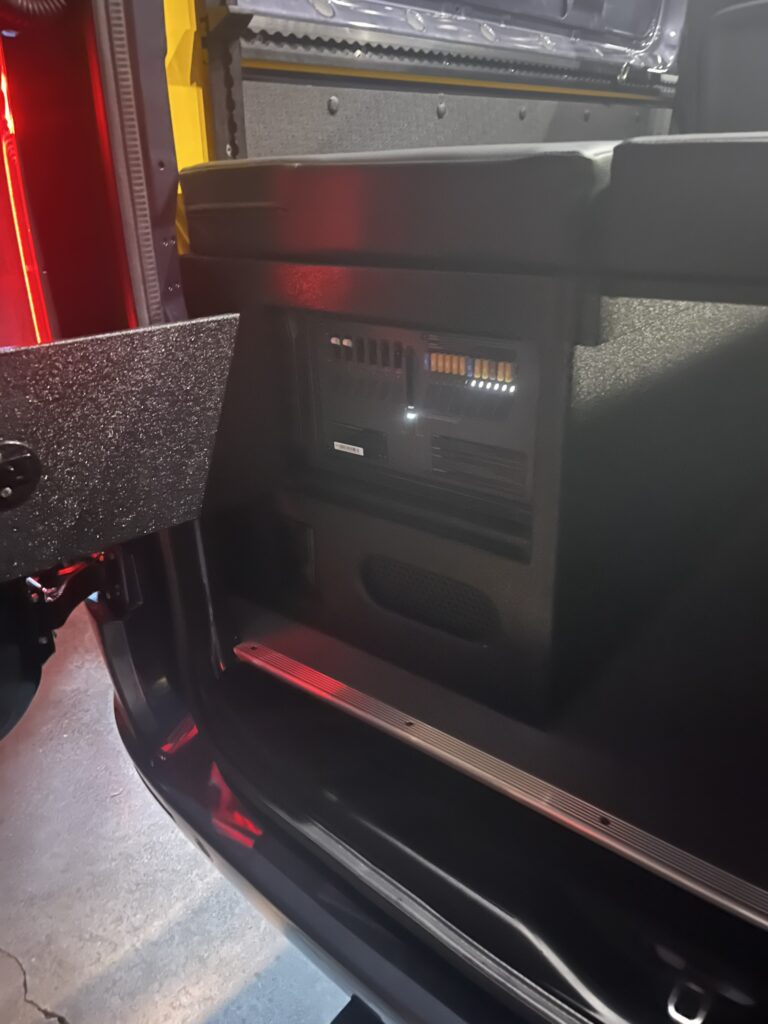
- ROAV RV Dinette Sleeper
- $5450
- Installation: Custom build by ROAV. Labor included in price.
- The dinette houses the inverter and battery on the driver side. The 22 gallon water tank, and all plumbing is housed on the passenger side. There is a significant amount of storage space left on both sides. I was able to keep the “hangout awning”, 2 pillows, tool kit, towels, 2 parka’s, and a handful of miscellaneous things my wife said I had to keep in there. I still have some room for more too!! The seats easily convert to a bed and the seat back cushions will fill in the center gap forming a relatively comfortable mattress. I purchased a memory foam top for a full sized mattress and use that on top of the bed. When we travel, I just leave the bed down. I did not add a table option yet because my kids are messy, so we just make them eat outside.
Planned Upgrades
- Dinette Sleeper
- MOAB Elevator Bed
- Interior Paneling and lighting
- Rear door speakers and front door speaker upgrade
- Overhead Cabinets and Microwave

Is there a way to demonstrate the effectiveness of the lights on the new rack. Can you test the lights at night? Can you show a photo of the lights in the dark?
As of today the lights are not yet wired. I will definitely post a full review of the lights once they are wired up.
Hi Josh,
Just found this page and love the information and tips. I’m pretty new in my build (‘25 144’ HR Crew) and have been looking hard at build kits (ADWAGON, RB, LH). I really like the Lost Hiway’s kit you used. I’ve been on the sprinter-source forum and some people have been critical of LH’s customer service in regards to instructions/install questions etc… Curious what your experience was like. How was the install? And how have things held up over the past year or so?
Thanks for your time & insights
Hi Reuben,
Thanks for leaving the comment. My experience with LH has been pretty pleasant so far. They are located in Hepseria Ca. and I am in Orange County. I physically drive by them when I’m headed out to Utah and was able to stop by their shop. They were pretty helpful getting the kit installed and explaining everything. Maybe you caught them on an off day? There Kit was pretty helpful in getting everything installed on the interior of my van. If you are needing some custom work done, I really have had great experience with the guys over at ROAV in Huntington Beach. They can handle just about any task and are very friendly to work with as well.
Good to hear you’ve had a good experience with Lost Hiway. I haven’t had any interaction with them yet, I’ve just seen guys on the Sprinter forum be critical of their support. But I was planning on stopping buy their shop next time I’m passing through that area. Love the modularity of their kit and adding stuff to the L-Track. I’m in Costa Mesa, so I’m definitely going to look into Roav, given they’re so close by. Thanks for the feedback back!